Enhance Studio UX with Schema Thumbnails
- #Pro Tips

In almost any Sanity studio, adding image thumbnails to an array of schema can be incredibly. When managing complex datasets like sections on a webpage, having image previews helps content editors quickly identify and select the right items. This visual aid can speed up workflows, reduce mistakes, and provide a more intuitive editing experience—especially in cases where images are key identifiers.
SanityPress comes included with flexible options to display image thumbnails in your Sanity schema, enhancing usability for editors. In this guide, we’ll cover how to set up these previews in different views, including list and grid formats, so you can find the best configuration for your project.
The List and Grid Views🔗
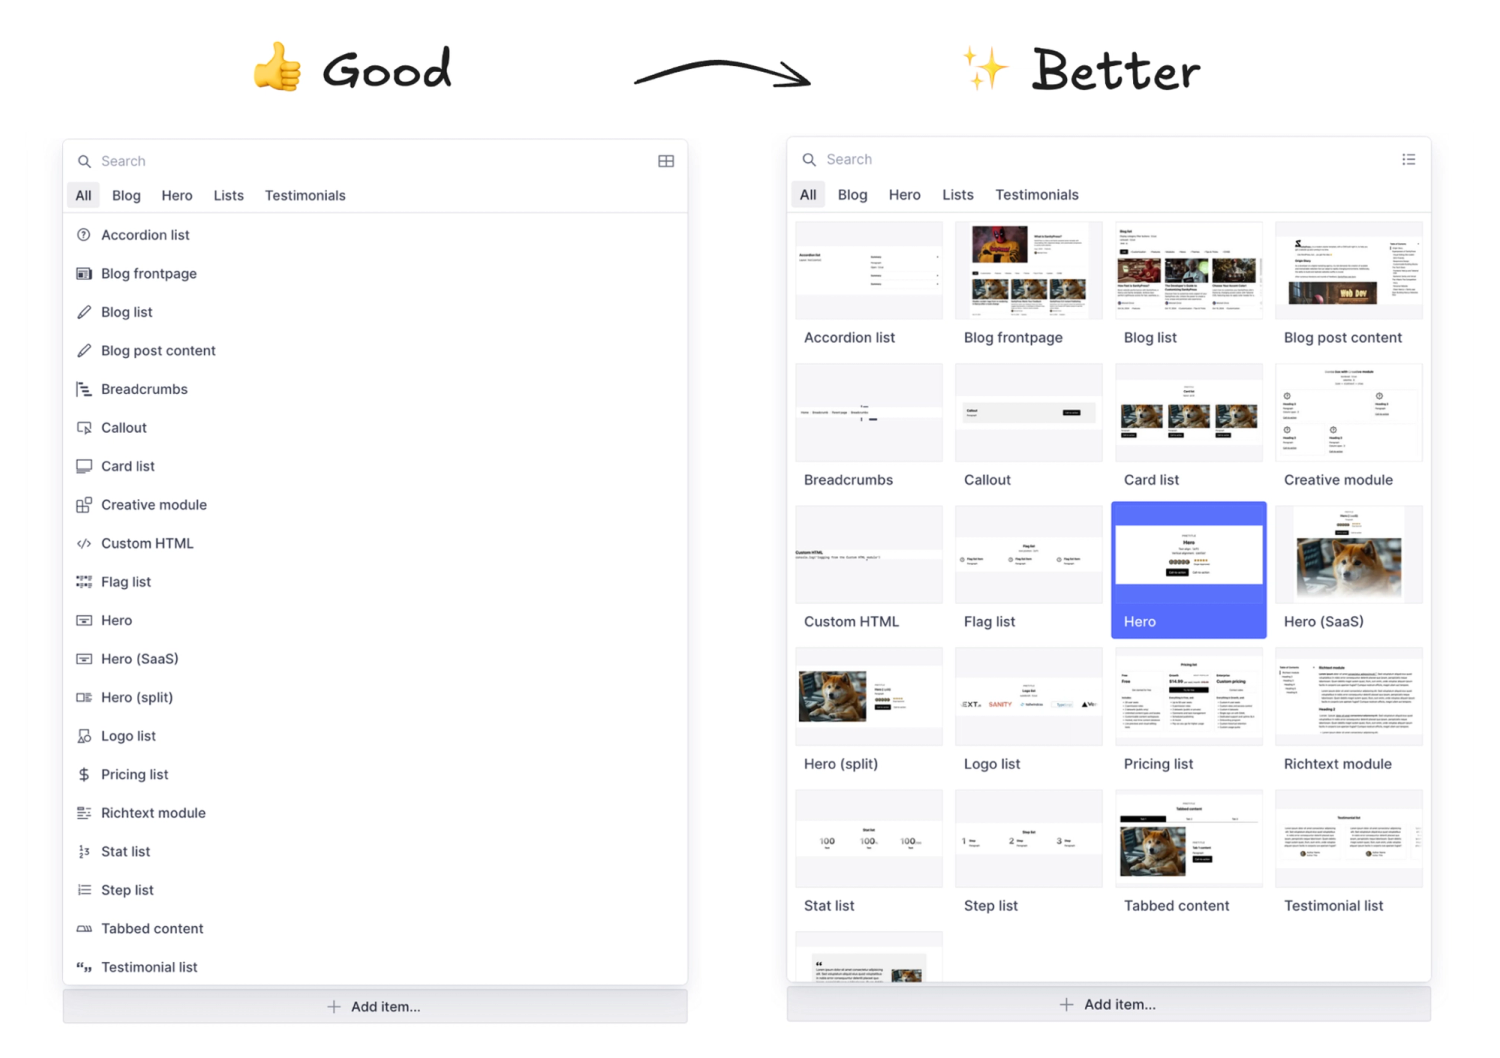
List view with icons (good)🔗
For simple content types, a list view with icons is a practical way to keep the Studio organized and easy to scan. Icons act as quick visual cues, giving a higher-level overview at a glance, perfect for quickly scanning the available options. Read more in our guide on optimizing list previews.
Grid view with thumbnails (best!)🔗
For content types where visuals are essential, such as galleries or product items, consider using a grid view with image thumbnails. This setup allows editors to preview each item within the Studio, making it easy to select specific entries without opening each document. Thumbnails enrich the editing experience and are especially helpful for design, media, or ecommerce projects.

How to add image thumbnails🔗
Enabling thumbnails is as simple as adding the previewImageUrl method that returns the path to your image files (you can host locally or anywhere else (CDNs, etc).
import { defineField, defineType } from 'sanity'

export default defineType({
  // ...
  fields: [
    // ...
    defineField({
      name: 'modules',
      type: 'array',
      of: [
        { type: 'hero' },
        // ...
      ],
      options: {
        insertMenu: {
          views: [
            {
              name: 'grid',
              previewImageUrl: (schemaType) => `/admin/thumbnails/${schemaType}.webp`,
            },
            { name: 'list' },
          ],
        },
      },
    }),
  ],
})
Then, simple add your image files in the location you configured in the code above (e.g. /public/admin/thumbnails/hero.webp).
Optimizing Thumbnails with ImageMagick’s mogrify Command🔗
To keep your Studio performant, optimize thumbnails with ImageMagick’s mogrify command. This command resizes and converts images in bulk, ensuring they load quickly without compromising quality:
mogrify -resize 480x -format webp *.pngWith this command, images are resized to 480 pixels wide and converted to the efficient WebP format, ensuring a fast, smooth Studio experience.
Final Thoughts🔗
Displaying image thumbnails in the Sanity Studio provides content editors with a more intuitive, visually guided editing experience, making it easier to recognize, select, and manage content quickly.
SanityPress comes included with built-in support for image thumbnails in page modules, making it simple to set up rich previews that boost usability, especially for visual-heavy projects. Whether your project calls for icons, full thumbnails, or a mix, SanityPress enables you to create a highly functional, editor-friendly workspace.
